
 At Optimum7, I do my best to grow a little bit every day. Whether it is researching a new skill, learning a bit more about a client’s industry, or simply making time to get to know a coworker a little better, I find it very important to adapt and evolve both professionally and personally.
One of the ways we facilitate this growth at Optimum7 is through the use of an internal forum. On our project management system, we’ve designated a section that is purely for employees to ask and answer questions, or request tutorials for skills they’d like to improve.
As a relatively small company, it is absolutely essential that we make the best use of our time. By using this forum, we are able to ask the team questions without interrupting their workflow. Instead, team members post a question and others can respond when they have time. In addition, when team members see an opportunity for growth, they can suggest a workshop and present for the group.
Our main intention is to help everyone learn and grow together. No one knows absolutely everything about everything, but I do believe all of our team members are budding experts in their respective industries. We can all learn from one another, and we have a lot to teach our teammates as well.
During this post, I will discuss the workshop that took place this week, the subject matter I provided to the team, and some tips on making your next workshop a success!
My First Official Workshop
On Wednesday, I had the opportunity to conduct my first workshop for the Optimum7 team. With several new members joining the Optimum7 family, I thought this would be a good time to give a tutorial on Wufoo, one of the online tools we use here at Optimum7.
What is Wufoo?
Wufoo is a third-party online form builder. Optimum7 uses Wufoo because it is user-friendly, efficient, and easy to track. I felt it was very important to review Wufoo with new team members and provide a bit of a refresher for our veterans, because if a Wufoo form is not set up properly, it will not accurately track our clients’ progress.
Fun Fact!
As a designer, I have a very special appreciation for Wufoo. This is greatly in part to Wufoo’s friendly, enthusiastic branding. Not only has Wufoo created an easy to use platform, but they’ve also made using it very enjoyable.
Kevin Hale, the user experience design lead and co-founder of Wufoo, explained the following when discussing Wufoo’s brand inspiration:
“The inspiration for our color palette came from our competitors. It was really depressing to see so much software designed to remind people they’re making databases in a windowless office, and so we immediately knew we wanted to go in the opposite direction.”
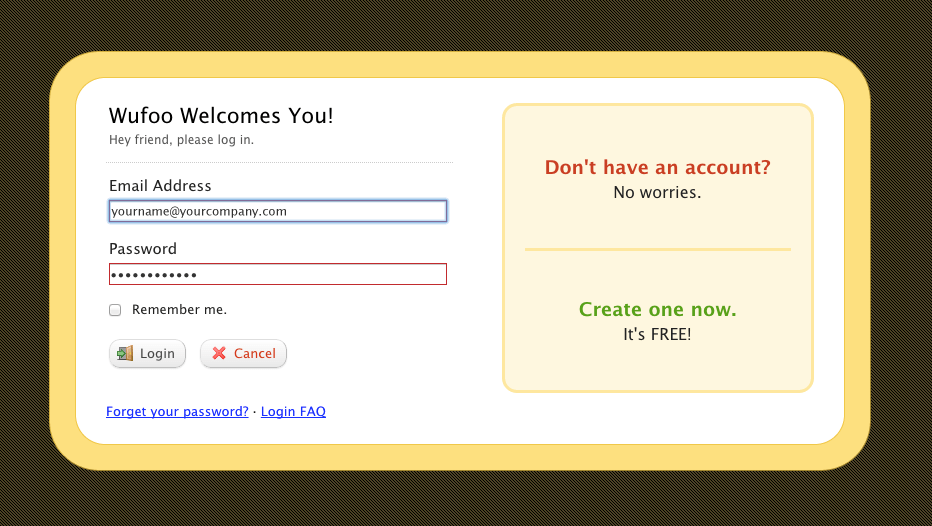
I don’t sit in a windowless office, but definitely appreciate Hale’s intention to put a little color into my daily work life! Check out the Wufoo homepage, complete with a dinosaur shaped login button.

How to Properly Set Up A Wufoo Form
Setting up a Wufoo form is fairly self-explanatory, but there are several small details that Optimum7 team members must carry out in order to successfully report to our clients. The following is a basic list of instructions on how to set up a Wufoo form.
Step 1:
Create an account or login to wufoo.com using your already established username and password.
Step 2:
You’ll be brought to the Wufoo dashboard. In the top right corner, click “New Form!”

Step 3:
Wufoo’s Form Builder will now open. The Form Builder consists of two main parts. On the left side, you have the different options that help you create your form, and on the right side is a preview so you can see how your form is working.
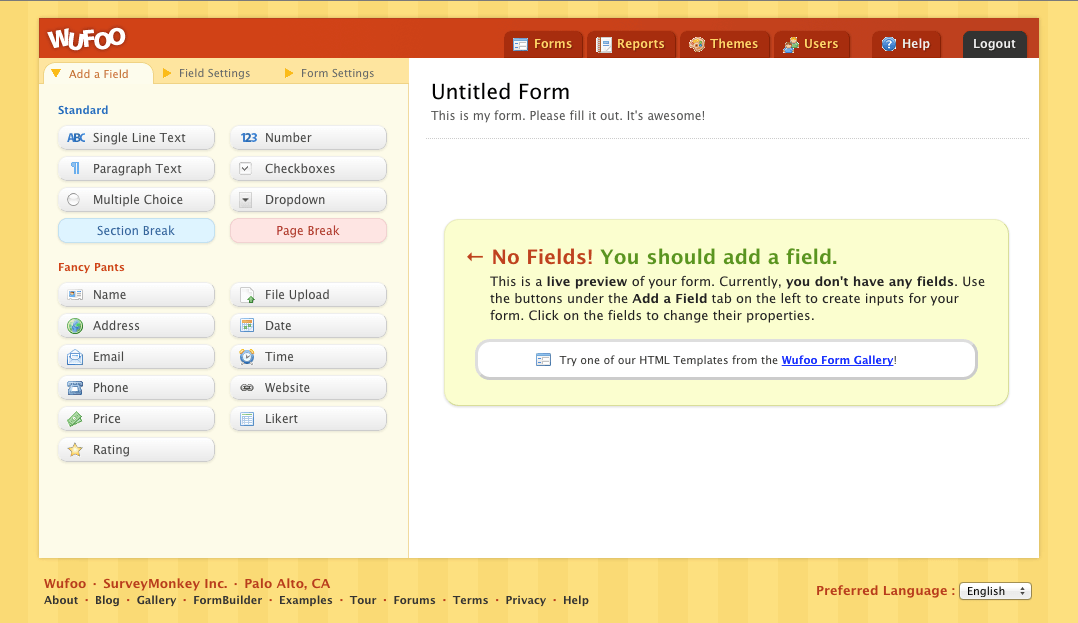
Step 4:
Let’s make our first form. For this example, we will use “Bridget’s Super-Duper Company” as our client and pretend we were setting up a basic contact form. We will begin by naming our form. Be sure to name your form something very descriptive, so it will be easy to find the form quickly in the future. For this example, we will call the form “Bridget’s Super Duper Company – Contact Form” by clicking the section that currently says “Untitled Form” and editing the Form Name on the left.

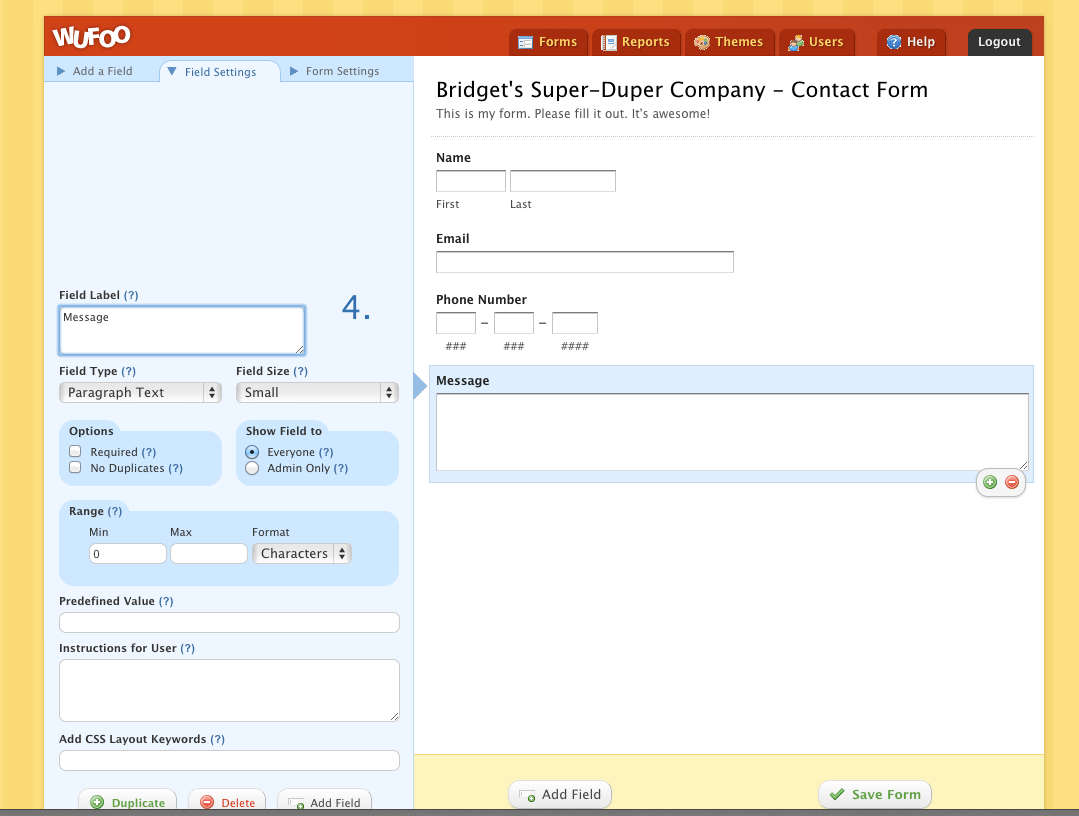
Step 5:
After you’ve titled your form, you’ll begin adding “fields.” Fields are basically the questions that make up your form. You can add them by simply dragging and dropping them from the left side of the builder to the right.
Pro-Tip: Remember to keep your forms as short as possible, usually between 3-5 questions. Otherwise you’ll drive potential leads away simply because your form is too long to do!

Step 6:
You will edit the text the same way you edited the form title, by clicking on the right and editing on the left.
Step 7:
You will continue to add all necessary fields until your form is complete. For this example, we will have a field for the user’s name, email address, phone number, and a brief message.
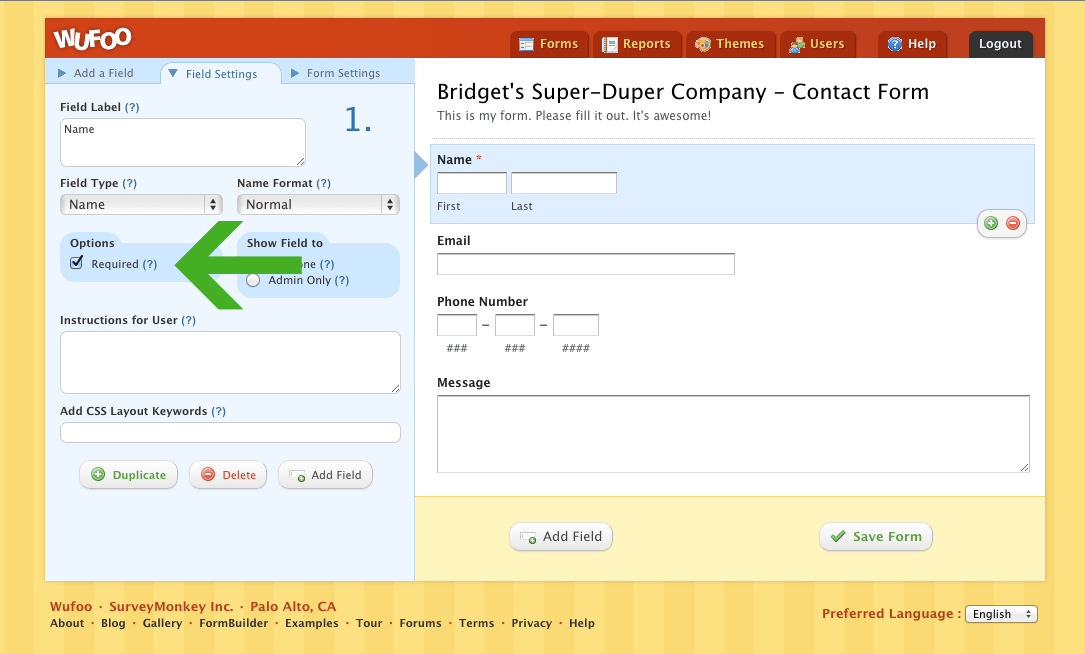
Step 8:
Once you’ve added all the necessary fields, you may give certain fields specific rules. For example, you can make the name field “Required” or make sure there are “No Duplicates” in the email field.
Step 9:
When you’ve finished adding all fields and apply all rules, you will go to the “Form Settings” tab on the left. Find the section that says “Confirmation Options”. Be sure to select the option “Redirect to Website”. Once this is clicked, you will be asked to add a specific URL. This is where you will put the success page for your contact form. The success page is page used to track conversions.
Pro-Tip: A designer or developer will likely have to set up this form for you, but it will be your responsibility to update the Wufoo form to make sure the URL is correct. Make sure that this URL is easy to remember/recognize. We often use multiple forms/thank you pages per client. Name both descriptively to avoid a headache in the future!

Step 10:
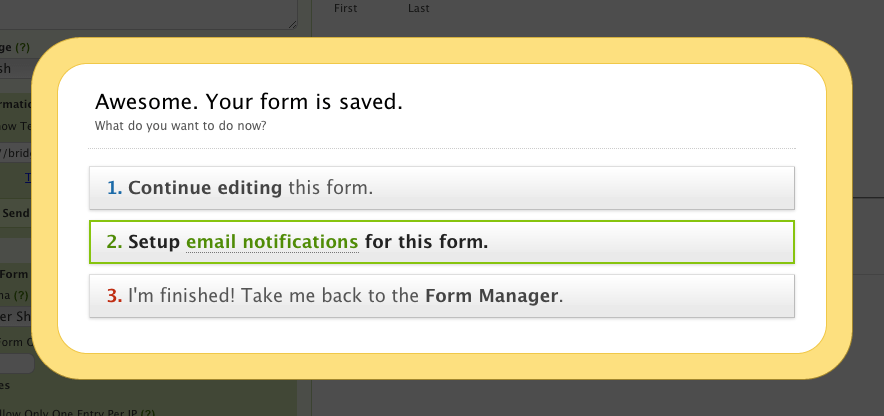
Once you’ve done all of this, click “Save Form”
Step 11:
You will be prompted to either:
a) Continue editing this form.
b) Setup email notifications for this form.
c) Go back to the Form Manager.
Choose the second option, “Setup email notifications for this form.”
Step 12:
On the left you will find a box that says “to My Inbox”. Enter any email address(es) that you or your client wishes to receive these notifications. You can also set up mobile alerts using the form to the right.
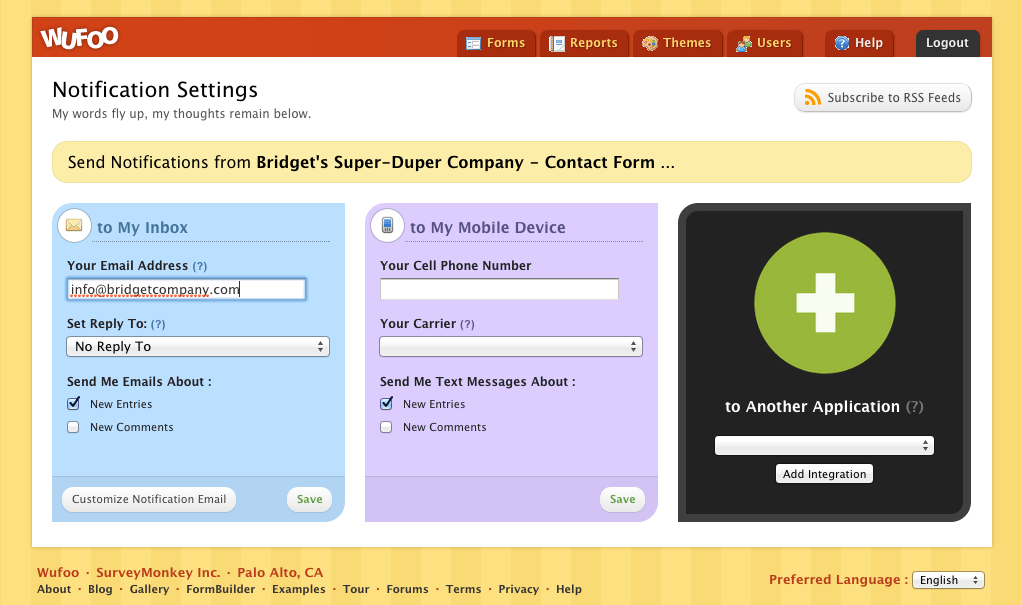
Step 13:
When finished setting up notifications, click save.
Step 14:
At the top of the dashboard, click the “Forms” tab to return to the dashboard.
Step 15:
Find the form you just created by searching the title.
Step 16:
On the right side of the screen, you’ll find a paint palette icon, with a drop down menu. Click the drop down menu and you can choose a theme for your form. These themes will remove the current styles from the form and replace them with new styles.

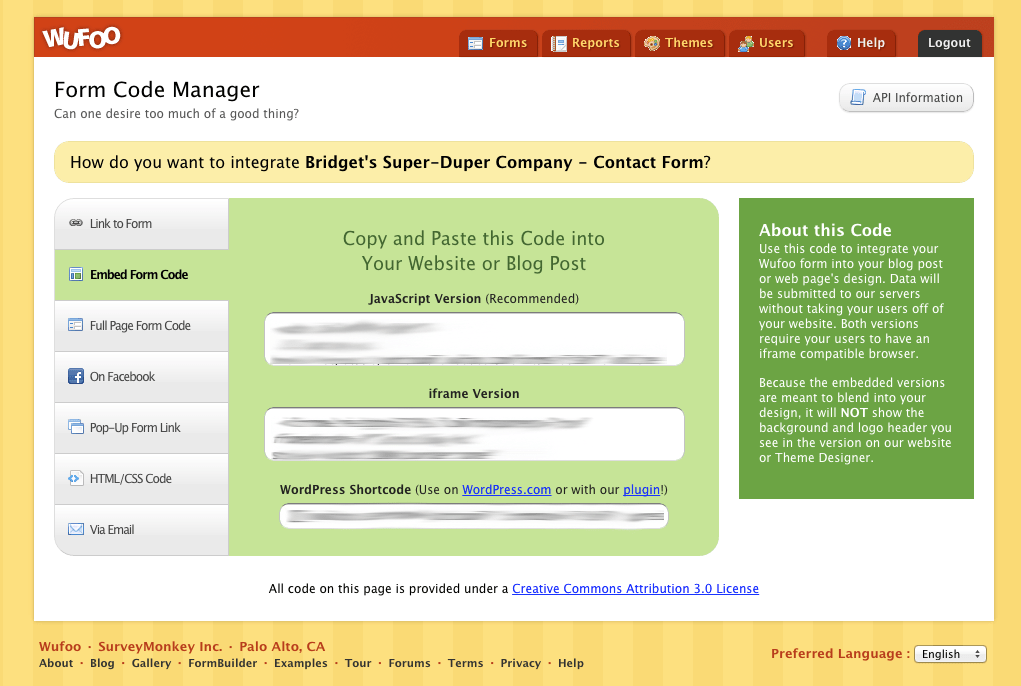
Step 17:
Now you’ve completed your Wufoo form. To add it to your site, click the “Code” icon.
Step 18:
This will bring you to the Form Code Manager. Choose the second tab on the left, “Embed Form Code.”
Step 19:
This will open a new tab within that page. Click the text within the first option “JavaScript Version (Recommended)”. And copy that text.
Step 20:
Open the desired WordPress site using the appropriate login information.
Step 21:
Open the page/post/widget where you’d like the form to appear.
Step 22:
Click the “Text” editing option in the WordPress interface.
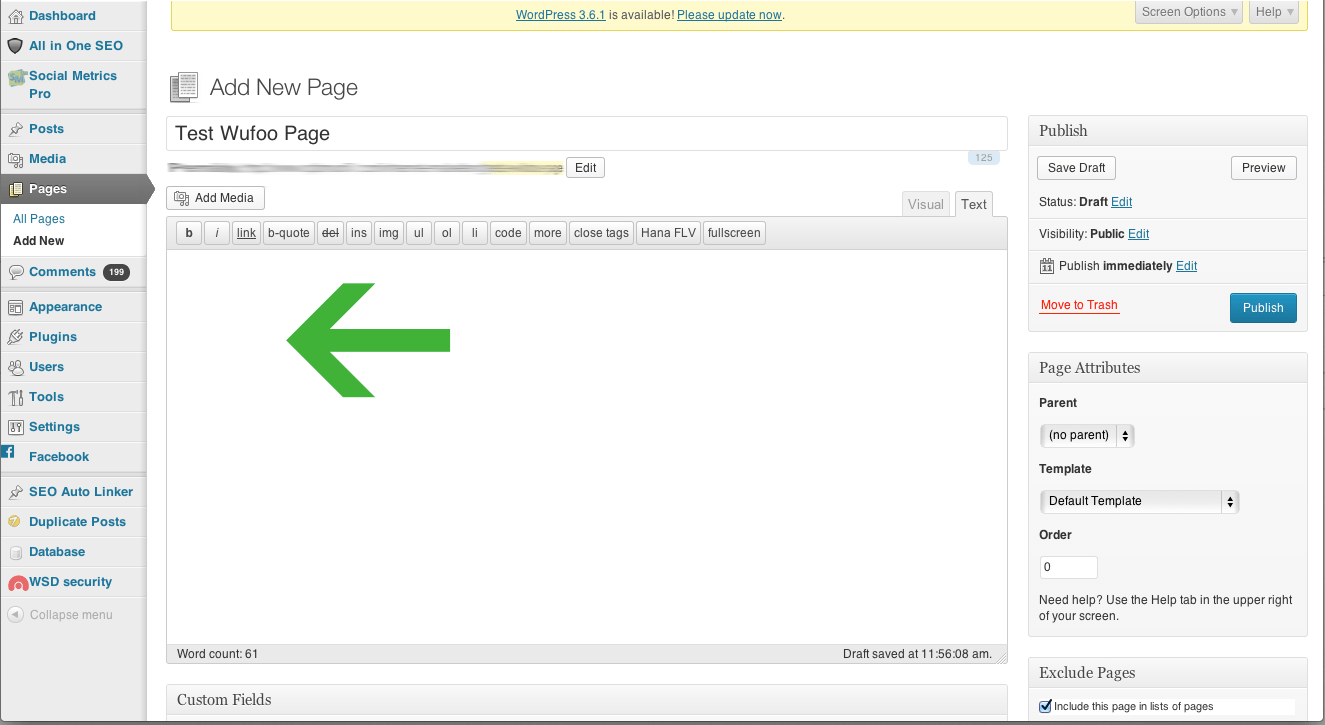
Step 23:
Paste the code from the Wufoo form and save the page/post/widget.
Step 24:
Open the page/post/widget and send a test. Did the client receive the notification? Was all information entered, as it should be? Were you taken to the proper thank you page when the form was submitted? If the answer to any of these questions is no, please carefully review the form and these instructions again.
That Extra Magic
Although Wufoo is very user friendly, and even fun to use, I must say that I have left a few small details out of this tutorial. At Optimum7, Wufoo is just one of the many tools used to serve our clients. There are additional steps that take place which are key to our process, but of course, if I told you all of our secrets, I’d have to kill you. ;-)
The Takeaway
As I mentioned before, Optimum7 uses workshops as a way to learn from each other. In addition to learning new skills, we also treat these workshops as a “break” in the day. Not necessarily in the sense of a relaxing vacation, but rather a productive break in monotony that helps to keep us on our toes and enhances our creativity. In addition, by increasing our interaction with each other on a professional level, we learn to better trust each other and can thus work better as a team. For example, do you remember the Wufoo fun fact I mentioned earlier in this article? That was something I shared with the team during the workshop. I felt that it made the tutorial a bit more casual and interesting.
In this week’s workshop, new team members learned about Wufoo, veterans refreshed their memory and everyone had the opportunity to productively collaborate and grow together.
Looking for team of marketers, designers, and content strategists who always have growth on their minds? Contact Optimum7 for a free consultation.