..I’ll start this article off with a small caveat.
This is part 1 of a 3-part guide to increasing your Amazon sales. So before you continue, bookmark this page now because you’ll want to return to it later.
Part 1 – Amazon SEO Tricks You Need to Know to Jump Up in the Ranks (Published February 1st, 2016)
Part 2 – How to Quickly Increase Your Amazon Sales in 90 Days by Applying These Steps (Published February 4th, 2016)
Part 3 – How to Continue to Get Sales on Amazon After Your Store Is Setup (Published February 8th, 2016)
The year 2016 is well under way!
Did you reach your Amazon sales goal in 2015? I hope you did!
Here at Optimum7, I’ve gone through hundreds of trial and error processes in 2015 to find out the list of things a person can do that would bring them the most sales in a short amount of time.
I’m going to provide you with practical things that you can implement within the next couple hours to increase your Amazon product rankings, gain more visibility, and most of all…get more sales! Before I give you this information, I must give you this warning that just knowing the information will not benefit you, but the implementation results will.
So here’s EXACTLY what I need from you…
I need YOU to commit to implementing ONE of these 5, then later come back, comment your findings and any other practices you put in place that increased your sales, to help out our fellow readers…that’s all I’m asking.
Sound fair? Great!
Just to make sure you don’t slack off, let’s make it social:
Share this:
[bctt tweet=”I’m committed to increasing my Amazon sales in 2016, and I’m going to follow this Optimum7 5-step plan.”]
Amazon SEO Tricks You Need to Know to Jump Up in the Ranks
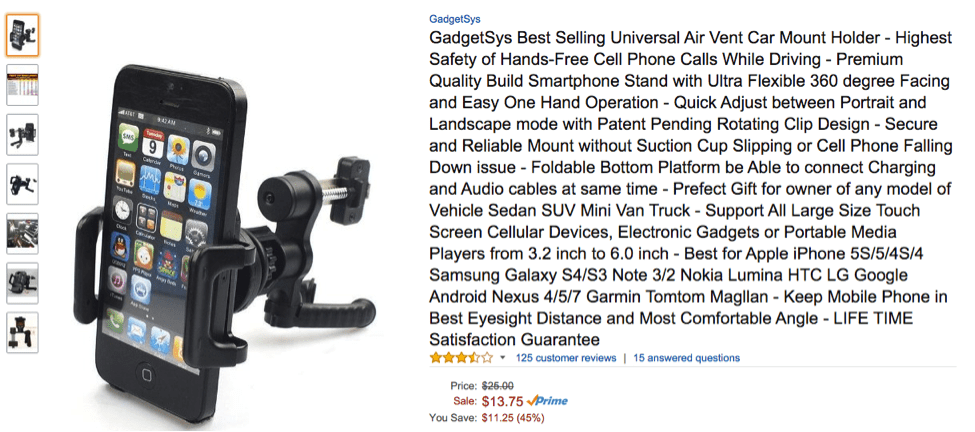
1. Product Titles
What you need:
The first and most important thing you need to have is a captivating and descriptive product title. I briefly went over this info in my previous article here: “Amazon Store Setup: Getting Your Store off the Ground Quickly”, but I’m going to cover it a bit more in depth here.
Your title must be descriptive, keyword rich, and as lengthy as possible without getting too SPAMMY.
Now I know it’s a bit hard to get used to if you’re coming from the SEO / Google optimization world since there are limits as to what you can do in terms of optimizing pages and keywords, but imagine Amazon as having no limits (in a sense).
Instructions:
Amazon states that you should be as descriptive as possible while remaining under 80 characters (if you’re adding the titles on through an excel sheet) or 200 characters (if you’re editing the titles through Amazon Seller Central).
You can use this formula as a guide when creating your product titles:
[Brand] + [product name] + [Detail/Feature (if applicable)] + [Quantity (if applicable)]
Here are some examples:
- Jabra FreeSpeak Bluetooth Headset
- Hanes Men Short Sleeve White ComfortSoft 100% Premium Cotton Tagless Crew Neck T-Shirt (Pack of 6)
- Crayola 24 Count Box of Crayons Non-Toxic Color Coloring School Supplies (3 Pack)
What to avoid:
Being “SPAMMY”
The reason I’m sort of emphasizing this is because there are people who tend to get a bit out of hand here.
You don’t want to be this guy:
or this guy:
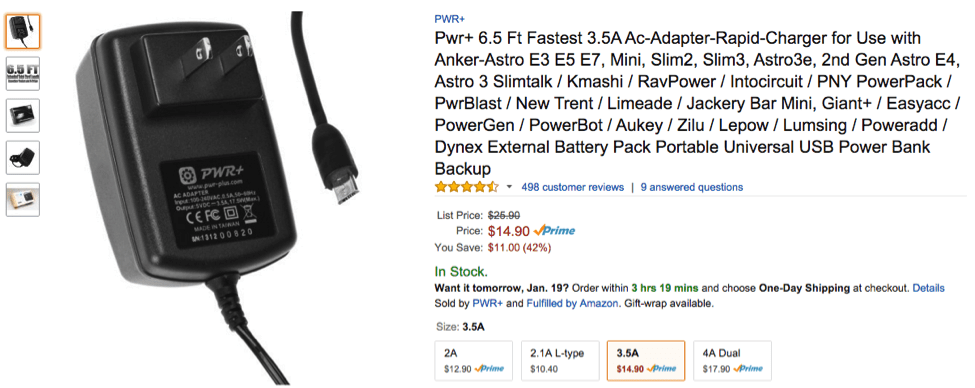
They’ve taken stuffing keywords in their title to a whole other level, they’ve just included every word they could think of in their title and that’s wrong.
I don’t think I need to beat a dead horse here but one thing you must remember is to make sure that you optimize your titles for your customers, not for the Amazon’s algorithm that in turn will benefit you in the long run.
2. Description, Bullet Points, and Search Terms
What you need:
I won’t get too deep into Selling 101 here, but…
The content you have in your bullet points and description is what will assist in converting a visitor, who’s just landed on your Amazon product page, into a paying customer.
All you have to do is move them from a “before” state to a desired “after” state.
People don’t buy your products logically…they buy the emotion. They buy into how the product will make them feel in the “after” state. Your content needs to clearly convey that.
Now your search terms however, are used to help potential customers find your product. There are pros and cons in having learned how to do keyword research for SEO and PPC but many times the cons outweigh the pros. When someone fills in their Amazon “search terms,” more often than not, they’re filled incorrectly. Let’s get into it!
Instructions:
Keywords
In Seller Central, Amazon has given some great information on what you can do to optimize your products but I’ll give you a brief overview on what it says.
- Amazon’s 5 Search Term fields accept a maximum of 50 characters each.
- There’s no need to repeat the same word, include different versions of the same word (t-shirt and tshirt), or have it misspelled
- Punctuation marks are a waste of characters (commas, periods, exclamations)
When I first began writing search terms for our clients I’d have our keywords written out like this:
| Search Term 1 | christmas t-shirt |
| Search Term 2 | merry christmas shirt |
| Search Term 3 | santa shirt |
| Search Term 4 | t shirt christmas |
| Search Term 5 | tee for christmas |
After realizing how bad the structure of my keywords were in comparison to the description Amazon’s Help pages, I changed them to this:
| Search Term 1 | comfy long sleeved christmas t-shirt |
| Search Term 2 | great holiday cheer holiday gift top |
| Search Term 3 | xmas day graphic tee |
| Search Term 4 | printed jolly santa snow day shirt |
| Search Term 5 | quality presents for yuletide |
In these new Amazon search terms I have no repeated words, there are no variations of the same word (t-shirt and tshirt), and I’ve added as many characters as possible to have more coverage across different keyword universes.
[TIP] 60+% of all searches involve MORE THAN 4 WORDS.
Now after we’ve done that in the backend side of things to help your products search rankings, we move on to what will help convert your visitor into a customer after they’ve landed on your product page.
Description
What you need:
The content you add in your description is one of the biggest weapons you carry in your arsenal.
- What is the product?
- What does it do?
- How does it benefit me (the customer)?
- it’s features…
- and…Why I should purchase it?
If your content can answer all the questions above, then you’ve won 80% the battle!
Amazon doesn’t care if your listing has the exact same title, bullets, description, and images as another website or any other product page for that matter. They just care if your product can convert their searchers into buyers. The better you get in doing that, the higher your product will climb in the rankings.
Bullets
What you need:
Piggy backing from above, your bullet points are just the short, straight to the point version of your description. All you have to do is take the most important points you have in product’s description, re-word them, and place them as your bullets.
[TIP] Your bullet points will tend to have a bit more influence on your products search rankings than the description. (We don’t know why this is, but I believe Amazon has placed the bullets above the fold for a reason, and they factor it into their algorithm a bit more than the description.)
What to avoid:
Short non-descriptive content!
You must make sure that you never leave your search terms, description, and bullet points empty. You also want to make sure that you don’t have short content either.
A product page with little to no content converts less customers, and if your product page doesn’t convert its visitors into buyers, then Amazon will begin to notice, and if it continually fails to convert customers Amazon will degrade the rankings of said product.
Want to Double Your Amazon Sales in just 90 Days?
Let our passionate team of online marketing experts grow your Amazon business so you don’t have to worry about the headaches and growing pains!
Let us bring you More Traffic and Increase Your Sales!
How to Quickly Increase Your Amazon Sales in 90 Days by Applying These Steps
Hey, I’m glad you stuck in there and made it to part 2! Now let’s start getting some reviews:
3. Reviews / Customer Questions
Facts tell – Stories Sell!
Amazon has taken this quote and made it an integral part with their system. They’ve learned that people’s personal experiences / testimonials sell the product better than any facts, descriptions, or bullet points could have combined.
That is why REVIEWS are by far the most important factor in the Amazon algorithm.
What you need:
The better reviews you have, the more sales you’ll begin to receive.
When speaking to my clients and answering questions they have regarding Amazon, at the end I let them know after we’ve completed the initial structure of their product pages that our entire focus will be to get reviews.
Now for those new to the Amazon marketplace, this is where confusion begins to happen.
I remember being asked this question like it was yesterday:
“One thing I know about Amazon is you have to get sales to get reviews, now you’re telling me we need reviews to get sales?”

Yes!
It’s the game of the chicken and the egg, which one comes first?
You can always sit around and wait for Amazon to bring you traffic organically or you can drive traffic to your site with paid ads, but without reviews it will be a waste of time and money. So I’ll tell you how you can get past this problem below.
Also, “Customers Questions” is one of the biggest things sellers tend to overlook. I’ll give you some tips in helping you not only get reviews but also get questions on your Amazon product page.
Instructions:
Here’s what you do…
If you sell a lot of products on Amazon then select your top 10 best sellers because they will be what we focus on.
The only thing you’re going to have to focus on here is getting 15 reviews as fast as possible. The faster the better. You don’t have to stop at 15, you can get 20, 30, 100, but the minimum is to get 15 reviews on each of your products’ listings page.
Here are some things you can do to get this moving:
Friends and Family Approach:
- Create a coupon code for your selected products through Seller Central and make sure you discount it all the way to either the product being free or under a $1.
- Contact all of your friends, family, loved ones, dogs, cats…ANYONE that can leave you an Amazon review. Ask them if they’d like a free (or highly discounted) product in exchange for their honest review of your product.
- Provide them with the discount code you created, and go through the normal process you would in the backend of Seller Central.
- Make sure you follow up with your friend so they don’t forget to leave you the review.
- Repeat steps 1-4 until you have 15+ reviews on your products.
Reaching out through Social Media (if you already have a large active social media following – 3,000+ followers)
- Create multiple coupon codes that can only be redeemed once for each of your products and again make sure the discount is free or under a $1.
- Create a simple free Instapage landing page where you’ll be able to capture your audience’s information (name, email, & phone number) and add check off boxes to let the customer know that they’ve agreed to provide you with an honest review in exchange for your product. (You’ll see why in Step 5.)
- Post on your social media profile, that you are having a special clearance sale and you will provide a specific number of followers a great discount on your product in exchange for their honest review. Place the link to the Instapage at the end of the post.
- Once the user has landed on your “capture” page and agreed to the terms, send them an email with the coupon code.
- If a customer has purchased your product and hasn’t left you any feedback two weeks after they’ve received the product, remind them through (1) an email, (2) a follow-up email 3 days later, (3) a friendly phone call the following day.
[Tip:] The more coupons you provide to users the more reviews you’ll have, which will in turn, give you help you further down the line.
Use a third party site (this approach is only for reviews): There are third party websites which have an entire audience ready to provide reviews in exchange for a highly discounted product. Here’s all you need to do:
- Select from all the third party sites that exchange highly discounted product for an honest review (make sure you take into account the amount of subscribers they have, and how much you have to pay as a seller to use their system).
- Reviewsio.com
- iLoveToReview.com
- Amzreviewtrader.com
- and etc.
- Get your account setup with the site you’ve chosen.
- Provide all the coupon codes necessary.
- Watch the orders and reviews pour in.
[Tip:] Amazon recommends that reviews are at least 75 words long. We agree, but we ask that you have people leave an absolute minimum of 30 words in your review.
What to avoid:
Do not ask your customers to leave you a “GOOD” or a “5 STAR” review, it goes against Amazon’s Terms of Service because some sellers do use reviews to manipulate their product ranking.
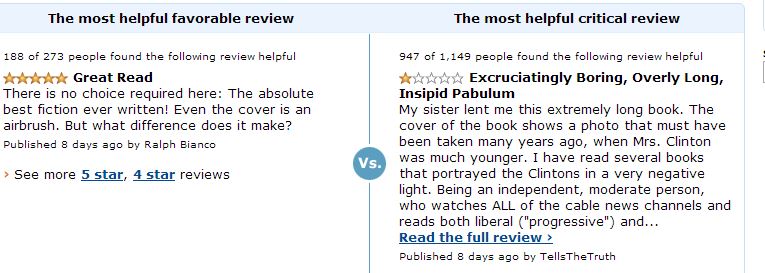
But of course you will have people that love your product and those that hate it, since we’re in a world with such vast opinions it would be imposible to please everyone (like in this picture).
All of the approaches we’ve provided above are to get you good “honest” reviews. If instead you begin to receive bad reviews regarding your product, shipping, or communication then address the customer’s issue as soon as possible.
[Note:] If you want to read more on Amazon’s updated Terms of Service (TOS) before you begin the offering discounts for reviews then you can read it here.
4. Shipping / Fulfillment
What you need:
….Amazon PRIME!
Instructions:
Since the day Amazon PRIME was launched it has acquired over 44 million subscribers because of the great benefits it provides its customers in shipping speed and cost. Not only is having Amazon PRIME a great tool for customers, it also provides a great benefit to sellers as well.
Amazon’s algorithm takes into account how accurately you ship your products to your customers. You need to build a reliable process when shipping a product to a customer to avoid customers receiving the wrong items, customers not receiving their item within the estimated delivery time, or customers receiving canceled orders.
So instead of having to go through the hassle of shipping and handling, Amazon allows sellers to ship products to their warehouses where they will pick, pack, handle, and ship any orders you receive. In essence, you’re paying a little extra (depending on the items you’re selling) to have Amazon handle the bulk of your workload. Since there are so many loyal Amazon Prime customers, having your product fulfilled by Amazon gives you the upper hand in these distinct ways:
- Amazon PRIME customers receive free 2-day shipping on mostly all products, or free shipping on orders $35 and above.
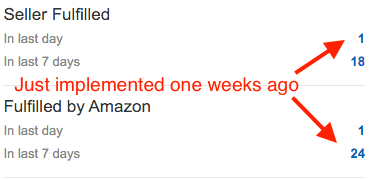
- You (the seller) get a “PRIME” seal next to your listing, which will increase the sales you’ll receive. (We see an average of 20% growth.)
- It relieves you of the day-to-day shipping and handling hassles associated with owning an online store.
![]()
Here are the steps to start fulfilling your products with Amazon:
New Product: (I covered how to upload Amazon products extensively in this article in case you need more help.)
- Log into Amazon Seller Central.
- Hover over “Inventory” and click on “Add a Product.”
- Add the existing items UPC, ESN, etc., or click on “Create a New Product Listing.”
- Select the category your product falls into.
- Input all the information of your product in “Vital info” (You can use the instructions above to make sure that the product is fully optimized.)
- Under the “Offer” tab, make sure you select the option “I want Amazon to ship and provide customer service for my items if they sell.”
- Complete the setup of the product and continue to Fulfillment by Amazon (FBA) and print the packaging labels to have the select amount of product you’ll be shipping to Amazon’s warehouses
Existing Product:
- Log into Amazon Seller Central.
- Hover over “Inventory” and click on “Manage Inventory.”
- Make sure the filter “Active” and “Fulfilled by Merchant” or “All” is selected.
- Check the boxes next to each item you’d like to set for Amazon Prime.
- Click “Action on # selected” > Click “Change to Fulfilled by Amazon.”
- Accept Label Service, and continue to print the package label to send off to Amazon.
Note: Down the line, instead of having your inventory shipped to you, you can have them drop shipped directly to an Amazon warehouse. Just speak with the manufacturer of your products and also with Amazon to make sure you get the best automated shipping system possible.
What to avoid:
Having your products fulfilled by Amazon is a great feeling because you don’t have to hold the extra inventory in your home/warehouse, nor get stuck with the hassle of shipping. However, even though Amazon will do a great job of handling that end of the business for you, make sure you continue to shipping more inventory to Amazon so you’ll always have products in stock to avoid missing any sales.
We’ve reached the end… Next up — Part 3!
How to Continue to Get Sales on Amazon After Your Store Is Setup
5. Drive Traffic to Your Product
What you need:
Many people believe creating ads and driving customers to a product page is what will get them sales. Well, this is right and wrong! Driving traffic to a product page that hasn’t been optimized is a waste of time and money.
If you do not have a minimum of 15+ reviews on your Amazon product page then go back up to the reviews section of this article. Also remember, all the steps provided above are to help increase your conversion rate. If you haven’t completed any of these steps either–then don’t pay for ads!
Instructions:
Here’s what you need in order to start sending traffic to your Amazon product page.
- Develop a budget.
- Have an optimized product page.
- Have platforms to run the ads.
- The Budget
Number one is simple, determine how much you can spend in order to get sales to your products while still making a profit. In this example, let’s say we’re selling iPhone cases.
Most business owners already know how to do this, but for the beginners I’ll briefly skim over it:
- What is the profit margin?
- Cost of inventory (shirts, ink, and etc.)
- Overhead cost (Amazon fees, shipping, etc.)
- Total cost to break even ( Total cost of product – [A + B] = Breaking even )
- Profit ( [A + B] – Additional price added = Profit)
- What is the average purchase order?
- What’s the lifetime of a customer? Are there repeat customers?
So for our iPhone cases:
- What is the profit margin? $10
- Cost of inventory (case, boxes, and etc.)
- Overhead cost (Amazon fees, shipping, etc.)
- Total cost to break even ( Total cost of product – [A + B] = Profit )
- What is the average order value? $30
- Are they repeat customers? Yes
- What is the lifetime of a customer? 60 Days
After we’ve analyzed the metrics, when it comes to selling our product, we establish a amount we pay for the ads. For our example, we know that our profit margin on the iPhone cases are $10 so we can only go up to a maximum of $10 before receiving a sale, or else we’ll be losing money.
- Creating an optimized product page
Since this entire article has been about optimizing an Amazon product page, following our instructions listed above and go straight to the next step.
- Selecting the platforms to run the ads
To continue with our example, you can also use Google Adwords, Facebook PPC, Instagram, and many other platforms to drive customers to your product page, but for now, we’ll stick to using Amazon’s advertising platform in this example.
Setting up your ads on Amazon is super easy. All you must do is:
- Log into Amazon Seller Central.
- Click on “Advertising” located at the top middle section of the page.
- Click “Create a Campaign” and input the:
- Campaign name
- Average daily budget (If you don’t have the financial resources to come out of the gate strong, then $10 should be suffice. For companies that do, start off which $100 and see how the campaign performs down the line.)
- Start date and end date.
- Now you must select a targeting type. (We usually select automatic targeting for the first to 2 weeks and watch how well the campaign performs before moving to manual. The reason is that we want to be able to download Amazon’s advertising report and later be able to see what keyword had the best ROI and we double down on those in the future.)
- Click “Continue to Next Step.”
- Begin inputting the following information for the specific ad group:
- Ad group name.
- Default bid (We usually always enter the suggested minimum and see how the ad group performs.)
- Select the products.
- Save and finish.
After you’ve set up the ads, you want to make sure that you continually check in and see the metrics. One of the most import numbers I pay attention to is Amazon’s ACoS (Advertising Cost of Sales). If you’re familiar with Google Adwords, then it’s fairly similar the CPA.
Amazon states:
“Your ACOS is the percent of attributed sales spent on advertising. This is calculated by dividing total ad spend by attributed sales. For example, if you spent $4 on advertising resulting in attributed sales of $20, your ACoS would be 20%.”
So the closer the ACoS is to 100% you want to make sure you watch that ad group carefully. If it doesn’t begin to go down, you want to make sure you optimize your ad campaigns, pages, keywords, and categories your product is set to.
Contact Us
After implementing all the tips we’ve provided above, you’ll be on your way to processing more orders and seeing an increase in revenue from your online Amazon storefront. Make sure you double back and optimize all the products you currently have listed on Amazon, and nail down a process to continue optimizing them in the future. There is more competition on Amazon than ever before, but don’t let that hinder you from increasing your revenue, and making 2016 your best year.
If you’ve read through this and it seems to be too much of a challenge to take on yourself, then feel free to leave a comment below with any questions or you contact us directly. We’ll be able to answer your questions and assist you with your eCommerce future on Amazon.
Want to Double Your Amazon Sales in just 90 Days?
Let our passionate team of online marketing experts grow your Amazon business so you don’t have to worry about the headaches and growing pains!
Let us bring you More Traffic and Increase Your Sales!